Showing posts with label chocolate. Show all posts

Friday, 28 October 2011

Mini rant

Why am I so hungry today?

Seriously whenever I eat something I'm hungry again about 30 minutes later.  What is wrong with meee?!

Possibly because I've had Come Dine with Me on in the background while I've been working.  Although I'm not sure why that food is making me hungry, it's not always the most appetising of things.

Anyway in the last 3 episodes I've watched there's been one thing that has really annoyed me.  That is people calling a tart, a torte.

Torte, believe it or not, is not just a fancy word for tart.  A tart is a pastry case filled with something delicious.
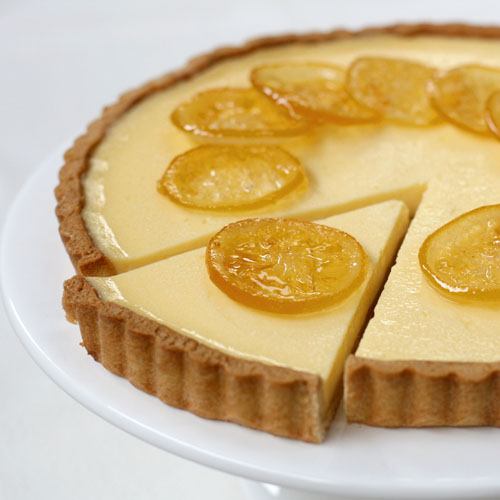

A torte is a CAKE.  It's a special kind of cake though.  It has no fat in it and little to no flour.  The reason it rises is because you separate the eggs and beat lots of air into the egg whites.


A famous version of a torte is the Austrian Sachertorte.  It's on my list of things to try baking in the future so you'll probably get to see the aftermath of that sometime soon!


It's basically just a lot of chocolate.  The cake itself is chocolate.  This is then covered in a layer of apricot jam and beautifully smooth and glossy chocolate ganache.  The final touch is a decoration in melted milk chocolate, this usually spells the word "Sacher".

Sounds delicious, no?


Wednesday, 31 August 2011

Pastries!

That's right it's pastry time!  Now if you're anything like me that word is one of the scariest words in cooking, well don't worry you won't have to make any of it by hand.  For what I'm going to show you today we'll be using puff pastry, which is even more of a pain to make than normal pastry, so just go down to your local supermarket and buy the pre-made stuff!

First I'm going to show you...

S'mores Pasties!
My inspiration for these was taken from this page that I found whilst stumbling through the internet.

There isn't a specific recipe for these so I just had to experiment a little.  I made mini ones but you can make these whatever size you want!


Ingredients
Pre-made puff pastry (I got around 10 of these out of 1/3 of a 500g block)
Milk chocolate
Mini marshmallows
1 egg

Method
1. Roll out the puff pastry until it's about 3/4mm thick.


2. Cut into squares.  You can make them any size you want but I think my squares were around 5cmx5cm


3. Add the chocolate and marshmallows to the centre of the square.  For mine I found that half a square of the chocolate and 2 mini marshmallows worked well.  Too many marshmallows and you'll end up with a sticky mess in your oven! (I found my marshmallows wouldn't stay in one place so only added them just before folding).


4. Crack the egg into a small bowl and beat the yolk and white together.  Once it's combined (or near enough) take a pastry brush and coat the edges of the pastry in this egg wash.  Don't throw it away we'll be needing it again in a bit!


5. Fold the squares in half corner to corner so you end up with little triangles.  The egg wash we just put on the edges should act like a glue and help stick it together.  To complete seal the seams (and for a bit of decoration) just crimp the edges with a fork.


6. Poke a couple of steam holes in the top with a sharp knife, brush on more egg wash so that the top goes nice and shiny and place them on to a baking tray.  (Always line your baking tray with grease proof paper!  You don't want to be cleaning up the sticky mess left behind if any of them leak!)


7. Place into a preheated oven at 200C.  Wait 15-20minutes or until golden on top.
8. Try to resist the urge to gobble them straight out of the oven and wait about 2/3mins for them to cool a little then enjoy!


It looks like this pastry thing is going to turn into a series of posts so next time it'll be... Mini cinnamon swirls!


Sunday, 28 November 2010

Chocolate Fudge Cake

I will post something that's not sweet soon but I just have to share this one with you all. It's currently in the oven and smelling oh so gorgeous so I will add pictures later. (EDIT: errr it all got eaten so quickly there were no pictures taken....Ooopsie!)

Chocolate Fudge Cake
(original recipe can be found here)

Ingredients
For the sponge...
85g self raising flour
30g cocoa powder
pinch of salt
115g light muscovado sugar (I used soft light brown sugar and it worked fine!)
115g unsalted butter
1tsp vanilla essence
2 eggs
2-3tbsp milk
For the sauce...
85g light muscovado/soft brown sugar
30g cocoa powder
225ml milk

Method
1. Preheat the oven to 180C.
2. Cream together the butter and sugar until they're light and fluffy.
3. In a separate bowl, lightly beat together the eggs and vanilla essence.
4. Slowly add the egg mixture to the butter and mix together thoroughly.
5. Sift in the flour, cocoa and salt. Fold this in gently.
6. Line and grease a deep, round cake tin (this cake rose a heck of a lot more than I expected it to.)
7. Spoon in the cake mixture and roughly smooth the top.
8. Whisk together the ingredients for the sauce. (I found that whisking it quickly got rid of any lumps)
9. Pour this evenly over the top of the uncooked cake mixture and then bake in the oven for 40-60mins.
10. Eat hot, warm or cold with whatever you want!

Sunday, 3 October 2010

Baking!

I love baking and recently I've been a little obsessed with it. I blame The Great British Bake Off for that!! (For those of you who didn't watch it it was a tv programme all about baking. I was in heaven for those 6 weeks it was on!)
So that pretty much inspired me to have a massive baking day last weekend and these are the results!!! :D


Cheese Scones
(original recipe can be found here BBC Good Food)*

Ingredients
500ml plain flour
3tsp baking powder
large pinch of salt
250ml grated cheddar cheese
3tsp sunflower/vegetable oil
125ml milk
1 egg
(it's weirdly measured in ml but I just measured everything in my measuring jug and it turned out fine!)

Method
1. Sift the flour, baking powder and salt into a large mixing bowl. Add the cheese and mix this together.


2. Mix together the oil, milk and egg in a jug and add this to the dry mixture.
3. Mix everything together until it forms a dough. (If it's too dry add a little more milk, don't worry if you think it's too wet and sticky at the moment.)
4. Dust your worktop surface with flour and roughly press out the scone mixture using your hand until it's about 0.5cm thick. (Don't use a rolling pin as this will pop any air bubbles that are in the mixture.)


5. Fold this in half and press out until it's 0.5cm thick again. Then cut this out using a round cutter (a perfectly round one will help your scones to rise better, however I don't have one. Don't wiggle the cutter either!! That will also prevent your scones from rising properly)
6. Place them on to a greased baking tray (I like to put grease proof paper on mine as well but this isn't necessary). Bake in a preheated oven (180°C) for 15 minutes.


Basic Scones
(not sure where my Dad got this recipe from...)


Ingredients

350g self-raising flour , plus more for dusting
1/4 tsp salt

1 tsp baking powder
85g butter , cut into cubes
3 tbsp caster sugar
175ml milk
1 tsp vanilla extract
squeeze lemon juice

Method
1. Heat oven to 220C/fan 200C/gas 7. Tip the flour into a large bowl with the salt and baking powder, then mix. Add the butter, then rub in with your fingers until the mix looks like fine crumbs. Stir in the sugar.
2. Put the milk into a jug and heat in the microwave for about 30 secs until warm, but not hot. Add the vanilla and lemon juice, then set aside for a moment. Put a baking sheet in the oven.
3. Make a well in the dry mix, then add the liquid and combine it quickly with a cutlery knife - it will seem pretty wet at first. Scatter some flour onto the work surface and tip the dough out. Dredge the dough and your hands with a little more flour, then fold the dough over 2-3 times until it's a little smoother. Pat into a round about 4cm deep.
4. Take a 5cm cutter (smooth-edged cutters tend to cut more cleanly, giving a better rise) and dip it into some flour. Plunge into the dough, then repeat until you have four scones. By this point you'll probably need to press what's left of the dough back into a round to cut out another four. Brush the tops with beaten egg, then carefully place onto the hot baking tray.
5. Bake for 10 mins until risen and golden on the top. Eat just warm or cold on the day of baking, generously topped with jam and clotted cream.

This recipe worked reasonably well just don't use too much lemon juice otherwise it will make the milk curdle!! (I found out the hard way.)


Rice Krispie Treats
(original recipe Rice Krispie Website)*

Ingredients
3 tbsp butter
100g mini marshmallows
500g rice krispies

Method
1. Melt the butter and marshmallows together in a pan on a low heat.


2. Mix in the rice krispies (if it's too marshmallowy just add more rice krispies until you're happy).
3. Put into a disposable foil baking tray (I find these best so you don't have to worry about scratching it when you're hacking away with a knife try to cut it up) add any decoration you want (marshmallows, sprinkles, chocolate) and then place into the fridge until its set.
4. Cut up into squares and eat!


*N.B. Incase you're wondering I've credited these recipes as they aren't ones I've made up. All the other recipes I've posted so far have been my own creation :)
Related Posts Plugin for WordPress, Blogger...